A user research database to help product teams take action on feedback
Research is a key component of creating a product that your users love. Using this Notion database, you can collect user research and make it actionable.
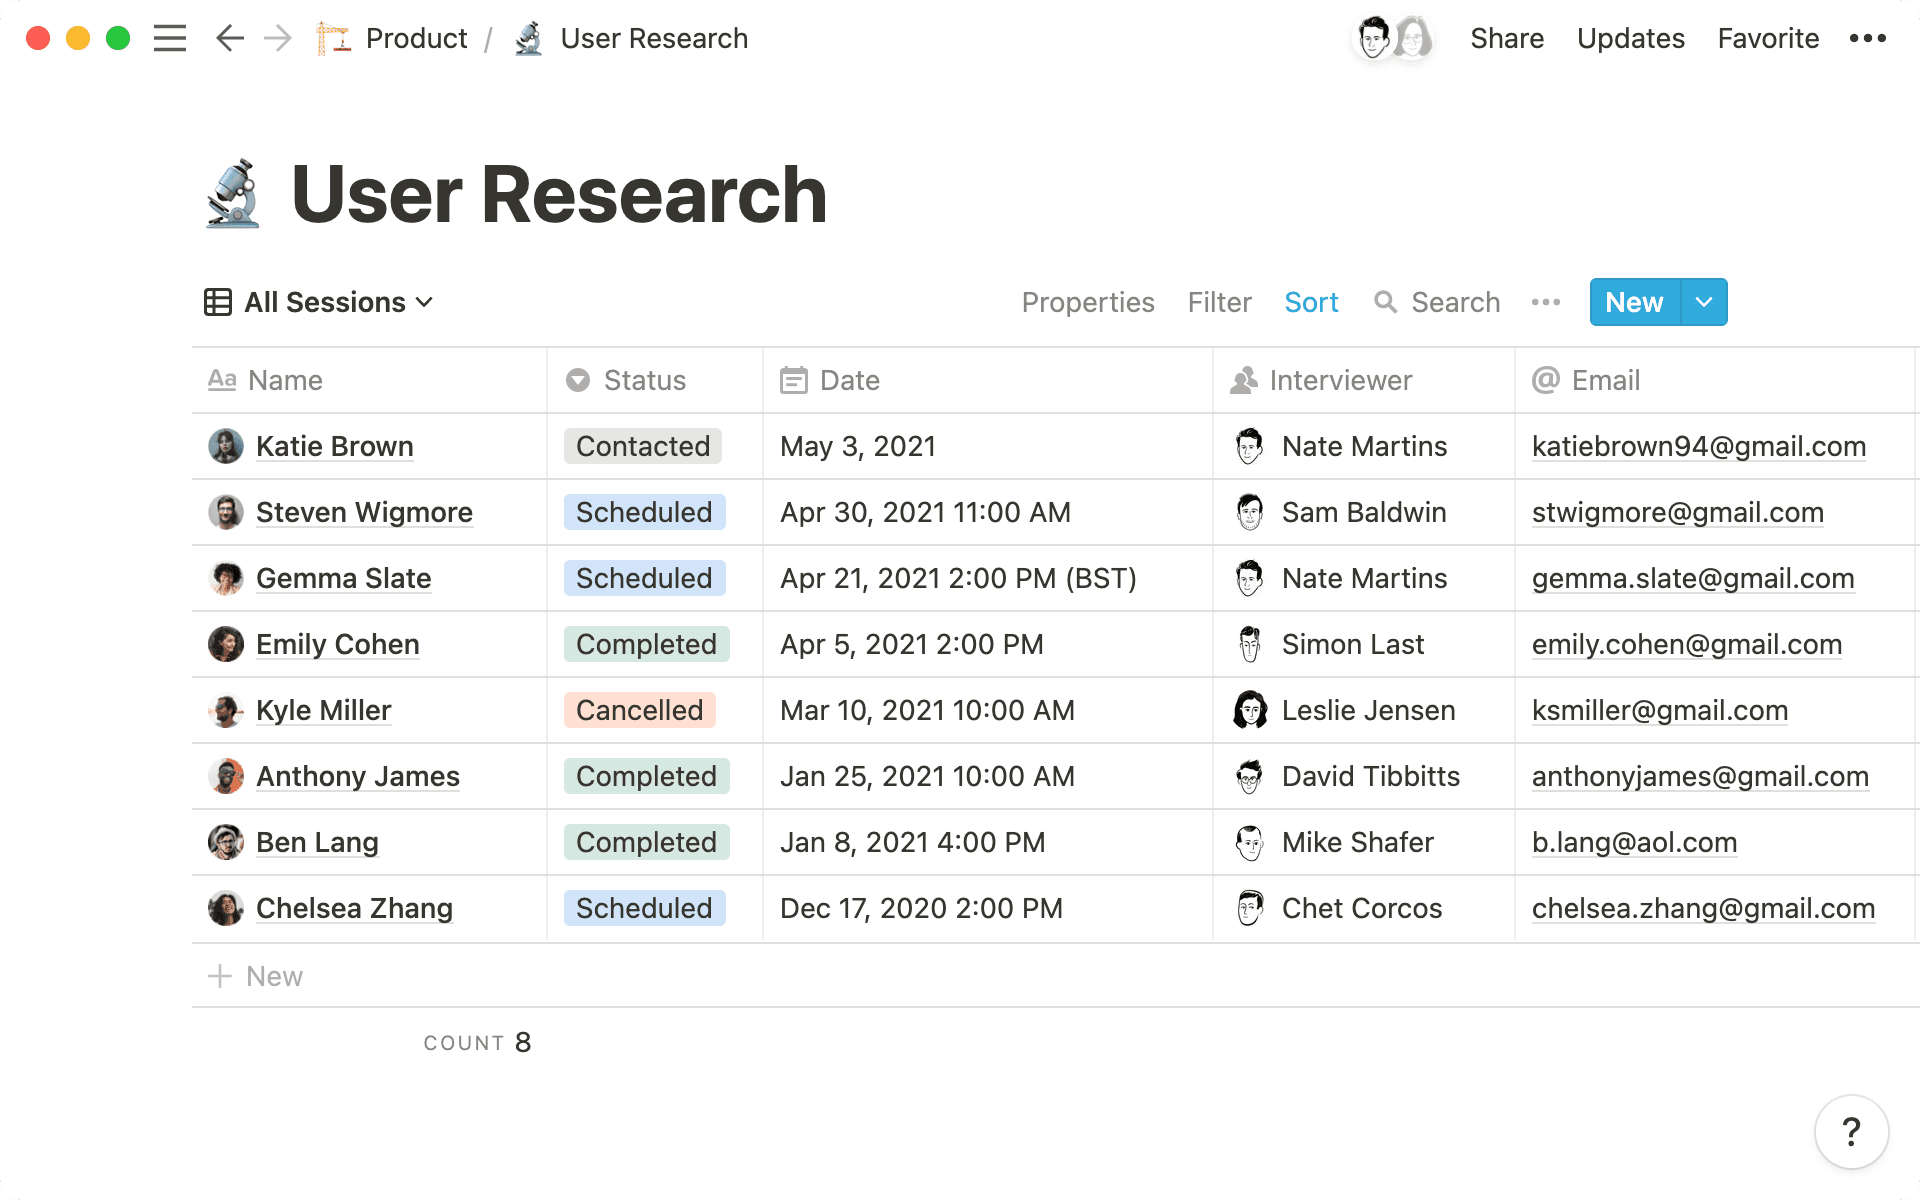
- Create a database to log your user feedback
- Customize individual pages
- Templates to speed up and standardize your work
- View information in different ways
- The voice of your users drives projects forward
Product teams are always on the lookout for ways to improve the product, and often, they find answers by listening to users.
User research provides the context and perspective for everything you do, ensuring you create impactful features and remove points of friction. It’s a never-ending process of asking questions, listening, and taking action based on the opinions and experience of the people actually using your product.
Without a system to collect, reference, and execute on what you learn from users, you risk wasting time and resources building the wrong thing, or fixing what isn’t broken.
Using this Notion database, you’ll have one place for all your user research, where you can organize it based on your needs, and connect the dots between this research and the projects they impact.

Better databases have arrived!
While the concepts outlined in this guide are still useful, references to specific product actions may be a bit outdated! Databases were redesigned in March 2022, so your experience may differ slightly from what’s pictured and described here. This guide outlines the new database features, including what's changed.
To get started recording user research, you can copy this template straight into your workspace, and customize it however you like.
To create your user feedback database, make a new page inside your product team’s wiki using the / command. In the menu that appears, choose Table - Full page and rename it “User Research” (you can also add an emoji to make it stand out if you like).
All the information in a database is organized by properties. Database properties allow you to categorize each database entry, and they can be customized based on the needs of that database. This gives you a high-level view of the most important information about each database entry — like the person responsible for the project, the type of project, and its timeline. Learn more about all the database properties available in Notion here.
Open the Properties menu at the top of the table and click Add a property to add a new one. When you add a new property, you can rename it and select what type of property you want from the list. Whether you want to know the user’s location, the length of your interview with them, or the topic discussed, properties help you customize how information in your database is categorized.
These are some properties you’ll want to include in your user research database:
Name — edit the
Titleproperty, and call it "Name." This is where you will enter the name of each user.Email — add an
Emailproperty so you can enter the user’s email address. If you want to send them an email at any time, you can click on the@symbol, and this will open up a new email.Phone number — add a
Phoneproperty where you can type the user’s phone number, handy for interviews so you're not digging around last minute.Interviewer — by adding a
Personproperty, you can tag the team member who conducted the interview. This will help you see which team members have conducted the most interviews.Date — add a
Dateproperty to enter the date that the conversation took place.Product feature — use a
Selectproperty to identify which feature the feedback refers to, so you can understand at a glance what the conversation is about. You can start typing in the column to create new tags.Status — add another
Selectproperty to assign a status to the feedback. Creating tags like “Contacted,” “Scheduled,” “Completed,” or “Cancelled” will let everyone know whether the interview has taken place.Completion time - you could add a
Numberproperty to show the duration of the interview.
You can add as many properties as you like to capture all the information your product team needs. Each one is totally customizable, so as your team adds features, reaches back out to certain users, or improves processes, these properties can change based on the types of interviews your team is conducting.
Every item in the database opens up to become its own, fully customizable Notion page. Inside this page, you can store details of the user interview, including evidence of bugs, observations from the interviewer, and any action items that need to be taken care of.
Just start typing, or hit / to bring up the menu of blocks that you can add to a page. Everything in a Notion page is a block, and we have a full guide to all the different types of blocks you can choose from. For now, though, here are a few you’ll find useful:
Text — choose
Textto start writing with plain text. You can type up notes from your interview, including the user feedback and any comments from the interviewer.Bullets — select
Bulleted listto organize your notes in a scannable format.Checklist — use a
To-do listto list out any action items, or make sure certain questions were asked.Headings — add h1s, h2s, and h3s to separate the different sections of your page.
Media — select
Imageto embed screenshots, orVideoto include a screen recording of a bug or issue. You can also drag media from your desktop and drop it onto the page.
No matter the type of interview your team is doing, Notion pages are a blank canvas to capture everything that comes out of these interviews. And because databases are comprised of pages, you’re able to both organize your work and do the work in one place. No need to jump around between different pieces of software to check your notes, find a user’s email, or see the bug they experienced. In Notion, all your team’s most vital information lives in one place.
Documenting your user research thoroughly is essential, but the process can take time. Coming up with questions. Sending a thank you email. Remembering to remove biases. Starting from scratch for every single interview would bog your team down — and inevitably, things will slip through the cracks.
Using database templates, you can have all this information at the ready for your team with a single click, helping save them time and help them follow specific processes you’ve put in place. In these templates can be prompts to ask for screenshots of the problem, a reminder to thank the user for their time, and even a list of questions you want to ask in every interview. You can even create different templates for the types of interviews your team does.
As well as cutting down on repetitive work, templates allow product teams to design a uniform process of collecting feedback, meaning you follow the same criteria every time, consider edge cases, and cement your process.
To create a template in your User Research database:
Click on the drop-down next to
Newand selectNew template.A new page will open, and you’ll see that you are editing a template. Give your template a name, something like
User Session.You can customize the page content and add anything that you want to automatically populate every time. These might be some headers, like
User Comments,Interviewer Observations, andAction Items. Under the headers, add some bullets or a to-do list.When you close the page, your template will be saved. Whenever you go to that drop-down, you can select your template and create a new entry in the database based on the format you created.
You can create multiple templates, perhaps for different types of users, or categories like general feedback or reporting a problem.
These templates can even be updated when you or your team learns better questions or processes from interviews. Simply edit the template, and your team can take these learnings forward with every interview they have in the future. It also helps new teammates contribute from the start — everything they need to conduct an interview is right in the template.
Notion databases can have different views, meaning that the same information can be sliced several different ways.
Want to see a calendar of all your interviews? How about the number of interviews each of your PMs did this week? Maybe you want to see interviews by the feature explored? Database views allow you to quickly pull up that information whenever you need it.
In your user research database, here are some ways you might use different views:
A calendar to keep track of interviews — seeing your interviews plotted on the calendar will make sure you never miss one. To add a calendar view, go to
Add a viewin the views dropdown. SelectCalendar. Database entries will appear on the date the interview is scheduled for or took place.A board organized by status — group entries by status using a board view. You can create another view in the same way as before, this time selecting
Board. In theGroup byoption, make sureStatusis selected. You can add statuses like “Contacted,” “Scheduled,” and “Completed,” and drag and drop from one status to the next. This helps you differentiate between interviews that are scheduled, those that have gone ahead, and ones you’re still waiting for a response on.Organize interviews by task — create a board view of your database that sorts interviews by what you spoke to the user about. To do this, go to the dropdown at the top left and click
Add a view. Type to rename it “By task” and then hitCreate. When you go toGroup byand chooseTask, your user feedback will be categorized based on tasks they relate to.
Database views help managers surface the information they need in an instant. Product managers can even create custom views for just themselves, for example, to see the interviews they’re doing this week. Whatever info you need to pull up, database views are the way to go.
User research helps everyone understand why their projects matter. Product teams, designers, and engineers can trace their work back to real user needs, helping everyone get aligned behind the ultimate goal: to build a product users love.
Notion lets you build bridges between information across different databases using relation properties.
By linking your user research database to your projects database, you’ll provide team members with the tangible feedback and context behind every project. Engineers can link their product roadmap to the user research database and see what users think about a feature, and designers can view the user feedback that sparked certain design decisions.
Here’s how to create a relation between your user research and projects database:
Add a new property to your user research database, and this time pick
Relationfrom the advanced property menu.You’ll be prompted to select the database you want this one to relate to. From the dropdown, choose your projects database, and click
Create relation.You’ll see that a new column has appeared in your database, and you can rename this
Projects.
When you click in the projects column, you’ll be able to select any entry from your projects database. This means you can link any piece of user feedback to an ongoing project. Likewise, when you’re in your projects database, you’ll be able to see user feedback that relates to each project.
This gives your team (and any team using this database) helpful context for features, updates, or new products.

User Research Database Resources
A guide to database properties.
Everything you need to know about blocks.
Project management for product teams.
A notes and docs system for product teams.

User Research Database Templates
Copy this user research template into your workspace.
Use this product roadmap template to organize all your team's work.
Keep all information centralized with this product wiki.


Something we didn’t cover?